It can be easy to install the wrong version of IntelliJ IDEA for Mac which can lead to annoying slowdowns when using the IDE. Let’s go over how to install the correct version of IntelliJ IDEA for an Apple Silicon Macbook such as one with an M1, M2 or M3 chip. The end of the guide will also go over how to verify that the correct binary version of IntelliJ IDEA is running.
Installation
You can install IntelliJ IDEA either by downloading the correct .dmg file from JetBrain’s website or by running a brew install command in the Terminal.
.dmg Installation
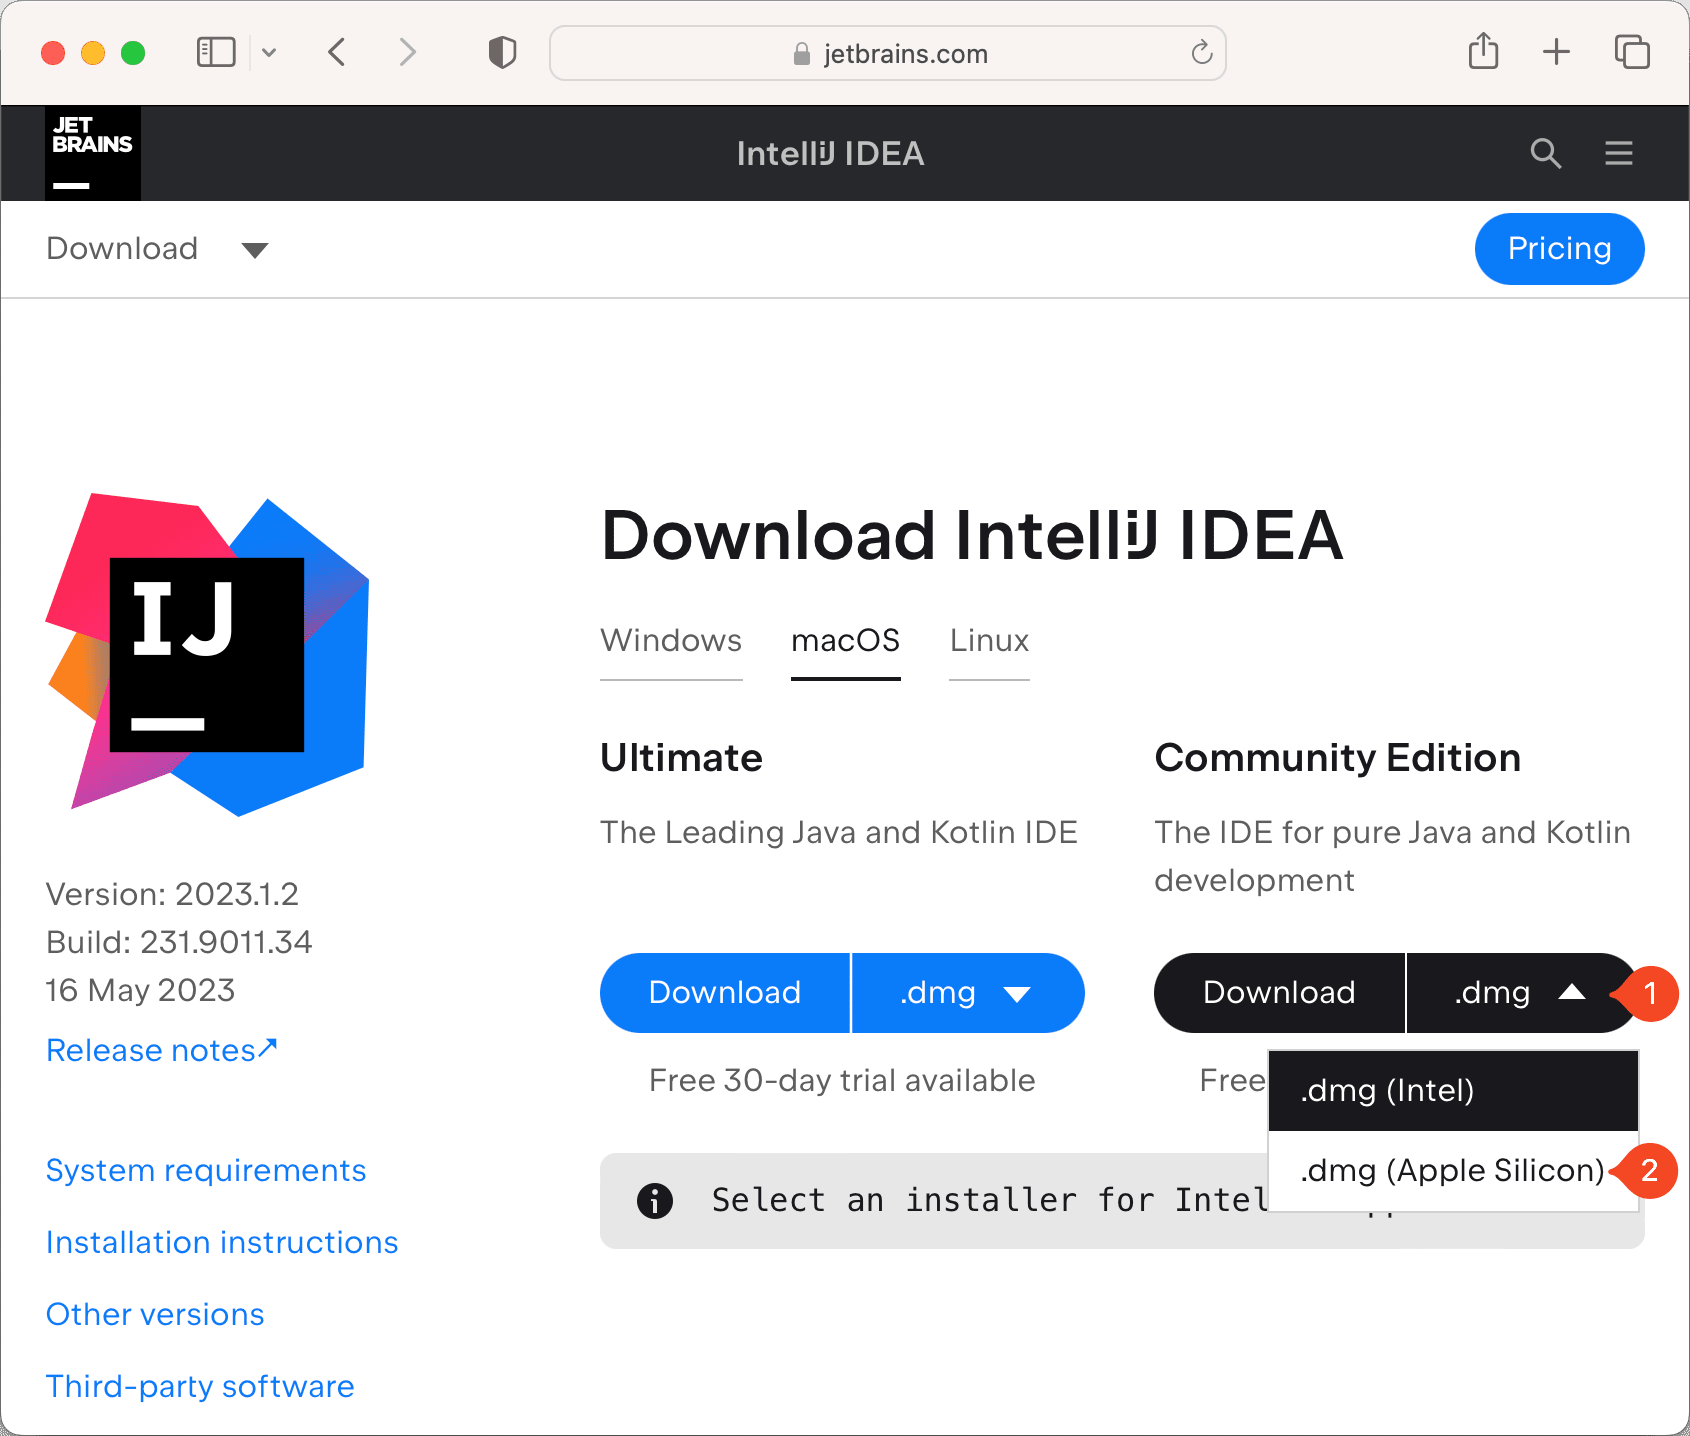
- First, go to https://www.jetbrains.com/idea/download/.
- Decide whether you want the Ultimate or Community Edition verion.
- Click the
.dmgdropdown to the right of theDownloadbutton. - Select the
.dmg (Apple Silicon)option. This should begin the download.
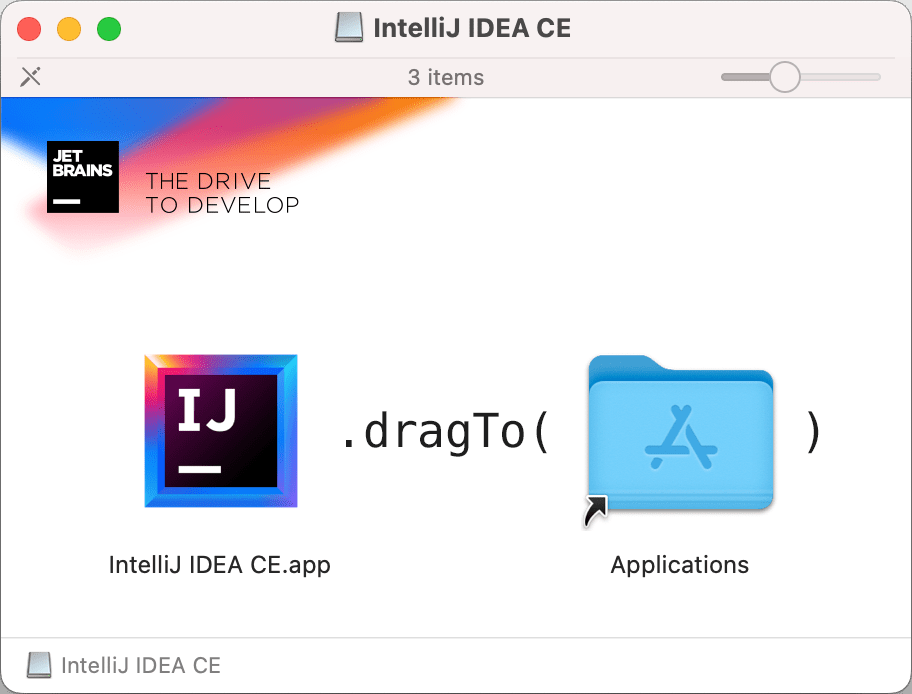
- Once the file is downloaded, open the file, and drag and drop
IntelliJ IDEAinto theApplicationsfolder. The application will be namedIntelliJ IDEA CEif you downloaded the Community Edition.
brew Installation
If you have the brew package manager installed, you can install IntelliJ IDEA with one command:
- To install IntelliJ IDEA Ultimate, run:
brew install --cask intellij-idea- To install IntelliJ IDEA Community Edition, run:
brew install --cask intellij-idea-ce
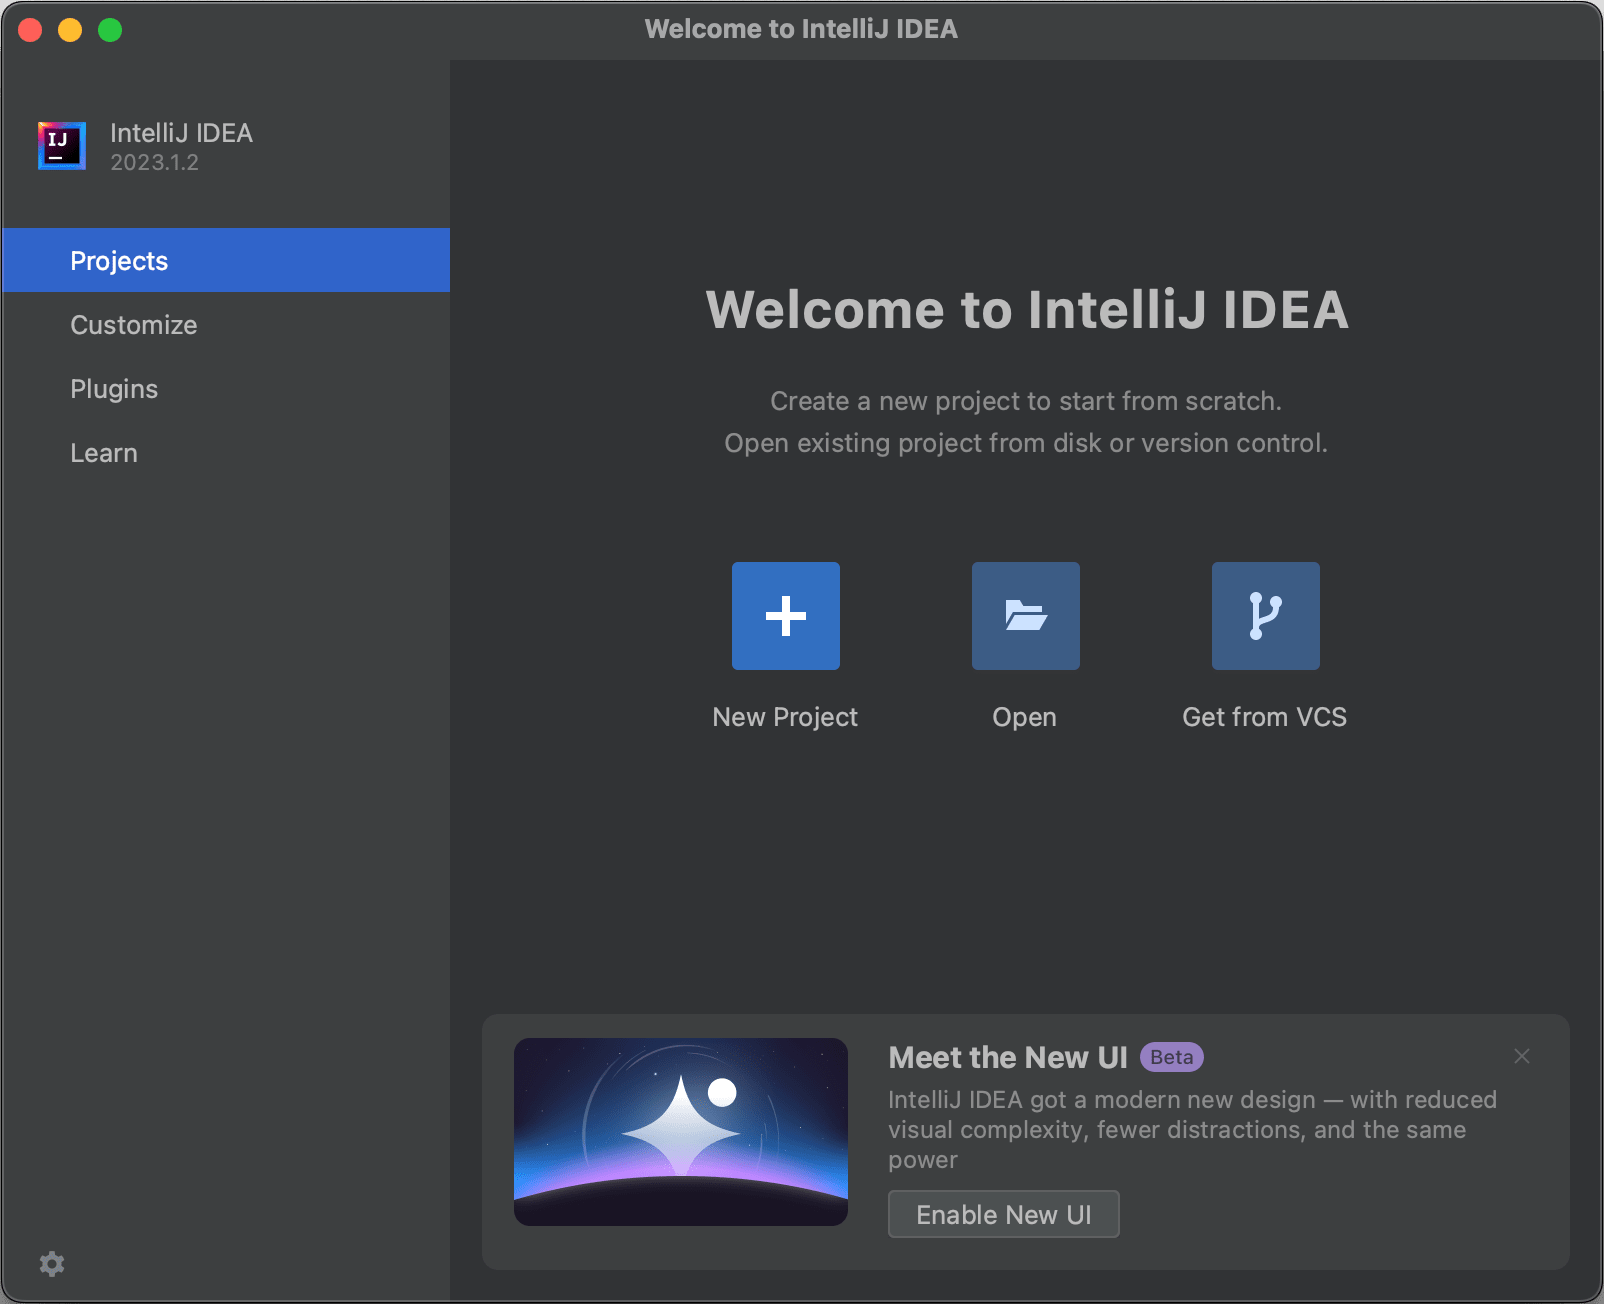
Congratulations, you can now run the Apple Silicon version of IntelliJ IDEA on your Mac!
Verification
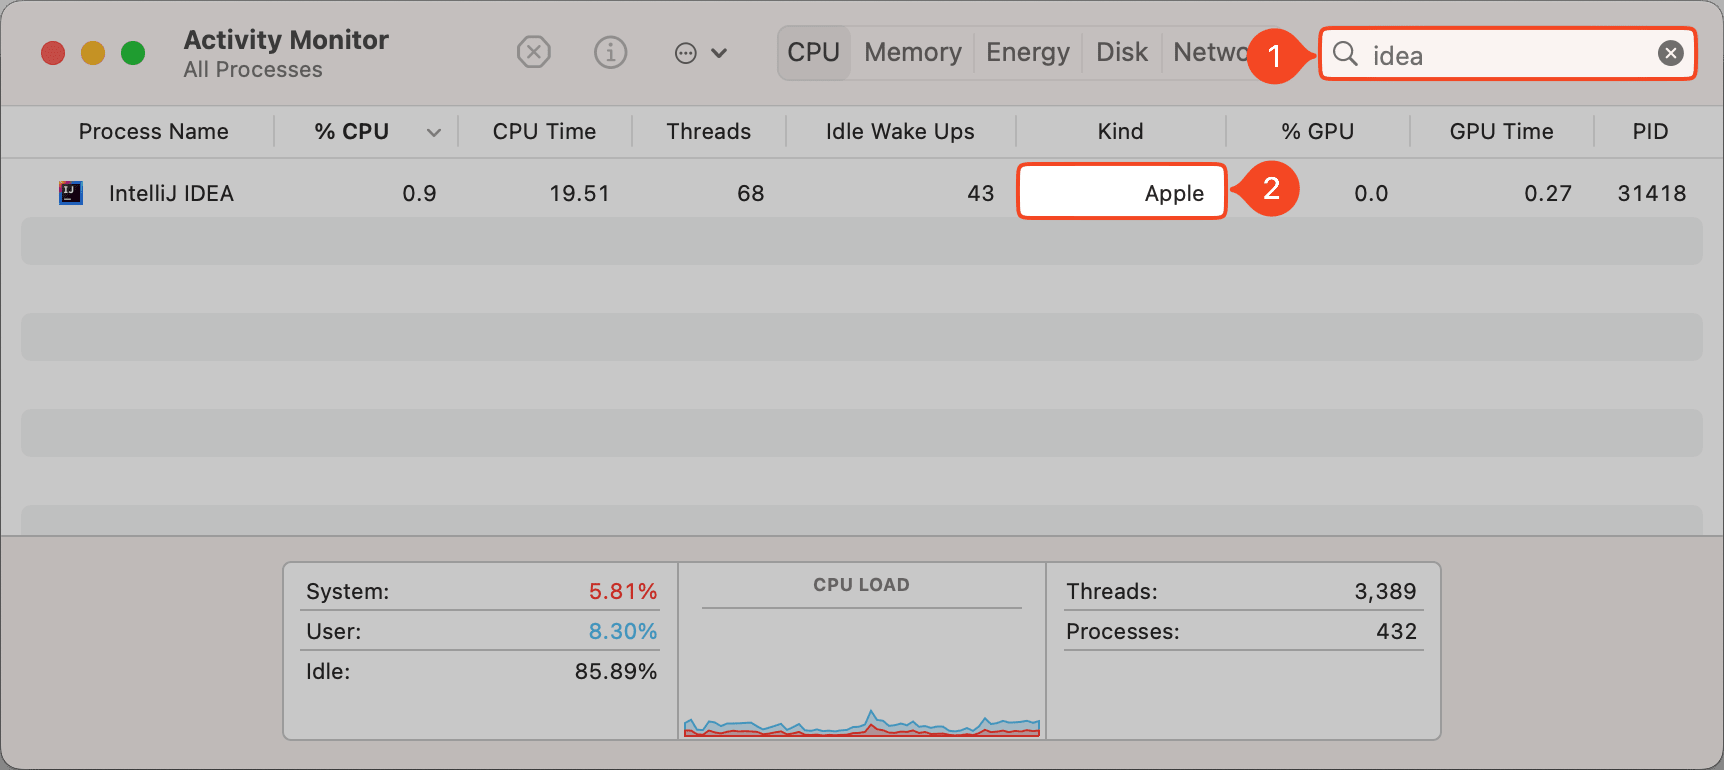
Now, let’s verify that the correct version of IntelliJ IDEA is installed. To do this:
- Run the
IntelliJ IDEAorIntelliJ IDEA CEapplication. - Open
Activity Monitor. - Go to the
CPUtab. - Search, in the top right corner, for
idea. - Under the
Kindcolumn, make sure it saysApple.- This means you are running the correct and most optimized version for your Apple Silicon Mac.
- If it says
Intel, then you are running the wrong and less optimal version for an M1 or M2 Macbook. - If you do not see the
Kindcolumn, right click the column bar, and checkKindto be able to see it.